


Didactum Monitoring Systems
Update and Recovery Options
Complete guide for firmware updates as well as backup and restoration of your configuration – via web interface, USB stick or microSD card.
Update and Recovery Options (Overview)
▼Your Didactum monitoring unit can be updated with new firmware at any time or reset to factory settings if required. Both processes are available via HTTP through the web interface as well as via a USB stick.
The currently installed firmware version can be found under Overview → System Statistics → About the System or in the System Menu → About.
Status Display on the LEDs During the Process
| LED Behavior | Meaning |
|---|---|
| "ERR" flashing | Update or recovery is currently in progress |
| "ERR" goes out, "ACT" flashes briefly faster | Process completed successfully |
| "ERR" stays permanently on | Process failed – repeat update or recovery |
Firefox: Tools → Clear Recent History · Chrome: Settings → History → Clear Browsing Data
Determine Driver Version
▼Before performing a firmware update, you should know which main driver version is currently installed on your Didactum unit – only matching update files should be used.
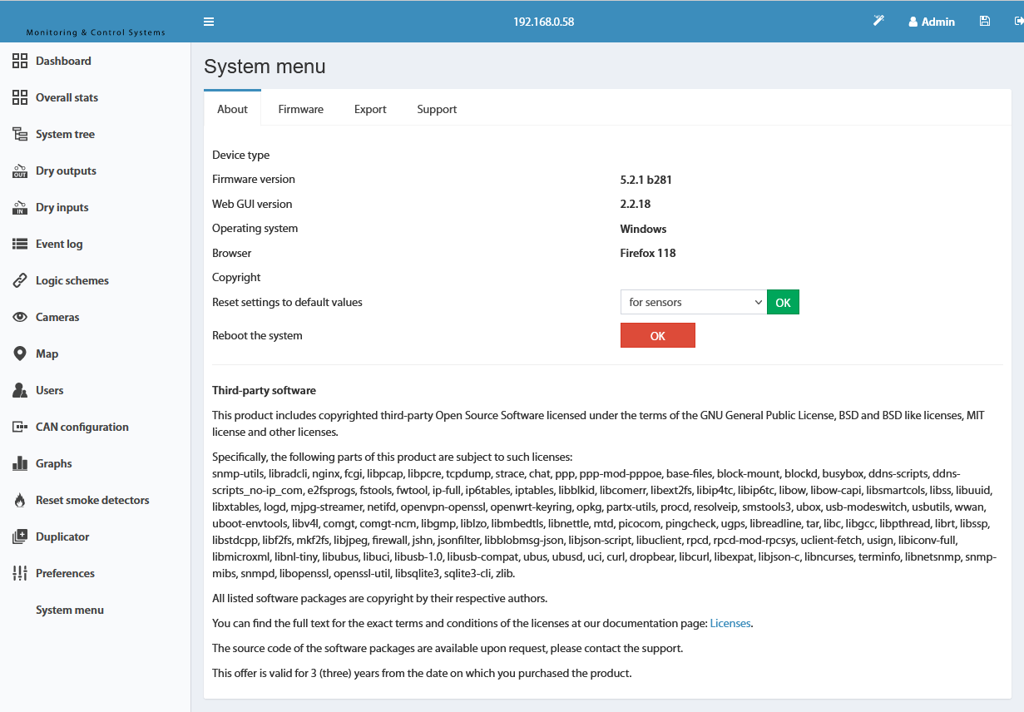
Open in the web interface: System Menu → About. There you will see the Firmware Version.
 🔍 Zoom
Here you can see the installed firmware version of your Didactum unit at a glance.
HTTP Update & Import Configuration
▼The firmware of your Didactum unit can be conveniently updated via HTTP using the web interface. Saved sensor or device configurations can also be imported using the same mechanism.
- First download the appropriate driver file from the driver download area.
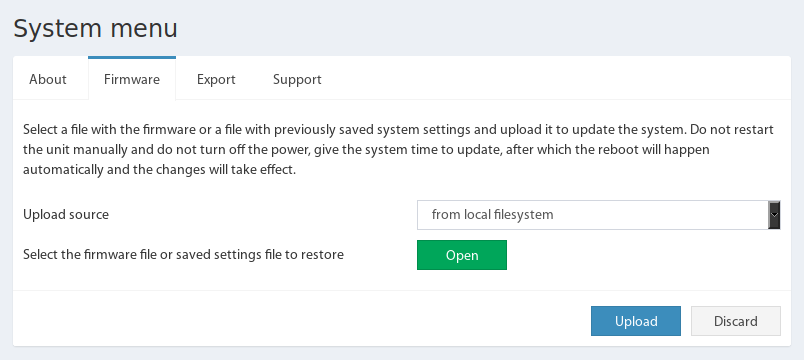
- Open in the web interface: System Menu → Firmware.
- Under “Upload Source” select the option “From Local Filesystem” and click on “Select File”.
- Select the update file and confirm with “OK”. The web interface will then display the message “Firmware Upload”.
 🔍 Zoom
Go to System Menu → Firmware, select the upload source and confirm the upload. Progress is also indicated by the LEDs on the device.
Update File Names by Device Series
| File Name | Applies to |
|---|---|
didactum-2.x.x-bxxx.zip | Driver Update (Web Interface) OLD GENERATION |
firmware-kernel.zor | Kernel/Linux System Update |
didactum-550-x3.x.x-bxxx.zip | Didactum 100V, 500III, 550III |
didactum-7.3.0-x.x.x-bxxx.zip | Didactum 50T / 100T / 300T / 500T / 550T - CURRENT FIRMWARE (as of 06/2026) |
Restore Factory Settings
▼If your Didactum unit is no longer reachable or you want to discard all settings, you can reset the device to factory settings. The procedure differs depending on the device series.
Didactum 50T, 100T, 300T, 500T and 550T
- The device must be switched on, the “ACT” LED must be active.
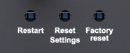
- On the back of the device there is the “Reset Settings” button. Press and hold it for a few seconds.
- The red “Error” LED starts flashing – release the button now. The LED flashes a few more times, then the device restarts to apply the factory settings.
- After the restart the “ACT” LED flashes again – the device has been reset to factory settings and is ready for operation.
- Access via
http://192.168.0.101, login/password:guest/guest.
 🔍 Zoom
Clearly visible on the back of the housing. Press and hold for several seconds and release when the “Error” LED flashes.
Older Model Series
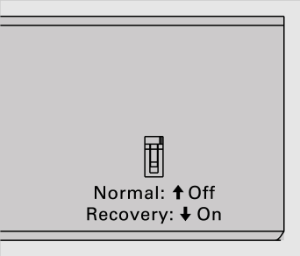
On older device series, there is a “Normal/Recovery” switch on the back instead of the button.
- The device must be switched on, the “ACT” LED must be active.
- Move the switch to the “Recovery” position for 10–15 seconds.
- As soon as the “Error” LED starts flashing, switch the switch back to “Normal”. The LED flashes a few more times, then the device restarts.
- After the restart the “ACT” LED flashes again – the device is ready for operation.
- Access via
http://192.168.0.193, login/password:guest/guest.
 🔍 Zoom
To reset, briefly set to “Recovery”, then switch back to “Normal” when the “Error” LED flashes.
USB Update / Restore Default Settings
▼As an alternative to the HTTP update (Chapter 3), you can also conveniently update the firmware of your Didactum unit using a USB stick – particularly useful when the web interface is currently unreachable.
Firmware Update via USB
- Download the file
firmware.zor(web interface) and – if available –firmware-kernel.zor(Linux kernel). - First update the kernel, then the web interface.
- Format the USB stick with the FAT32 file system.
- Copy the file unchanged (do not rename the filename!) to the stick.
- Insert the stick into the “HS” USB port.
Reset IP Address or User
In the archive “tools.zip” you will find two service files for cases where the web interface is no longer reachable:
| File | Function |
|---|---|
settings.zor | Resets the network address to 192.168.0.193 (or 192.168.0.101 on newer models) |
resetusers.zor | Resets the user management to one user: guest / guest |
Please refer to the readme.txt file in the archive for further details. The same rule applies here: Do not change filenames.
Restore Saved Settings via USB
- Format the USB stick with the FAT32 file system.
- Copy your saved configuration file to the root directory of the stick and rename it to
settings.zor. - Proceed as described in the next section.
Insert Stick and Complete the Process
Insert the prepared USB stick into the “HS” port and wait until the device has analyzed the contents of the stick.
Full Device Recovery (SD Card)
▼In case of serious problems – such as a defective CAN bus – a complete software recovery of your Didactum unit via a microSD card may be necessary. This procedure applies in particular to the models Didactum 50T, 100T, 300T, 500T and 550T.
Settings.zor file. Also check whether CAN is enabled in the network settings.Step 1 – Write Image to the microSD Card
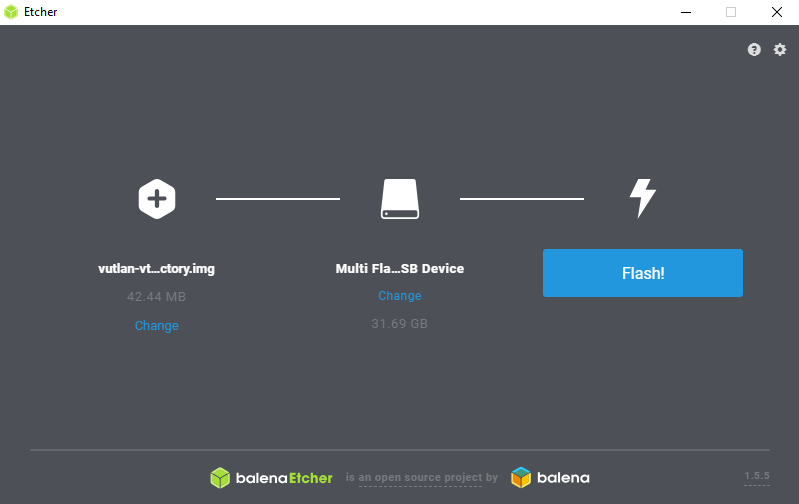
- Download the free tool Etcher[](https://etcher.balena.io/) and install it.
- Format a suitable microSD card with FAT32 and remove any existing partitions.
- Download the appropriate factory firmware file (contains the word
factoryin the name) from the driver download area. - Select the card in Etcher and click on “Flash!”. Wait until the writing process is complete.
 🔍 Zoom
Both are located on the device housing and are required for recovery in Step 2.
Step 2 – Perform Recovery on the Device
- Set the DIP switch “N-R” to position “R” (right) – the device will then boot from the SD card. Position “N” (left) is the normal mode, in which booting from SD card is disabled.
- Insert the card into the SD card slot of the device and press the Restart button.
- After the restart the “Error” LED flashes during installation.
- After successful completion the “ACT” LED lights up. If the “Error” LED lights up permanently instead, an error has occurred.
- Remove the card, set the switch back to “N” and restart the device.
Restore Saved Settings
▼A previously exported configuration file (Settings.zor, see Chapter 8 “Backup of Current Settings”) can be restored to your Didactum unit in two ways.
Variant 1 – Restoration via USB Stick
Copy the backup file under the name settings.zor to a FAT32-formatted USB stick and insert it into the “HS” port of the device as described in Chapter 5.
Variant 2 – Restoration via Web Interface (HTTP)
- Open in the web interface: System Menu → Firmware.
- Under “Upload Source” select the option “From Local Filesystem” and then select your previously exported backup file.
- Confirm with “OK”. The saved settings will be applied and the device will restart afterwards.
Backup of Current Settings (HTTP)
▼For administrators and integrators, the Didactum unit offers an HTTP-based interface for targeted backup of the current configuration – ideal for automation and custom scripts.
Permanently Save Running Monitoring Settings
Changes to the monitoring settings are not retained by default after a restart. Using the savetoflash call, the current settings are permanently stored in the flash memory.
Backup via HTTP Request
The current settings can be backed up via an HTTP-GET request to the file settings.htm. Without the param parameter, a complete backup of all settings is created:
For a selective backup, enter the desired areas – separated by a space – in the param parameter:
| Parameter | Description |
|---|---|
monitoring | Monitoring: modules, sensors, groups, map, USB webcam etc. |
canbus | CAN bus configuration |
dbusers | User database |
dbkeys | Access key database |
datetime | Date and time settings |
network | Network settings |
http | HTTP server settings |
log | Logging settings |
radius | RADIUS settings |
snmp | SNMP settings |
dyndns | DynDNS settings |
update | Update settings |
backup | Backup settings |
Automatic Backup via FTP Schedule
Using the calls getftpbackup (retrieve current FTP backup settings) and setftpbackup (set parameters), you can set up an automatic, time-controlled backup to an external FTP server.
| Parameter | Description |
|---|---|
noreboot | If value 1, no automatic restart occurs after configuration |
address | Address of the FTP server |
port | Port of the FTP server |
rdir | Remote directory on the FTP server |
username | Username for the FTP server |
password | Password for the FTP user |
interval | Backup interval: never, daily, weekly or monthly |
day | Day of the backup (weekday 1–7, 1 = Monday, or day of the month) |
hour | Time of the backup (00–23 hours) |